Working from home can create some unexpected learning moments.
In this case, CellScale team member and engineer Matt Brunsting and his daughter turned part of the workday into a simple Play-Doh compression test using the CellScale UniVert. It was a fun way to make mechanical testing feel approachable while also showing some of the basic ideas behind a real compression test.
This informal experiment demonstrates basic compression testing principles using a familiar material, making mechanical testing easier to understand for all ages.
If you want more background on the method itself, see our page on Compression Testing.
Preparing the sample
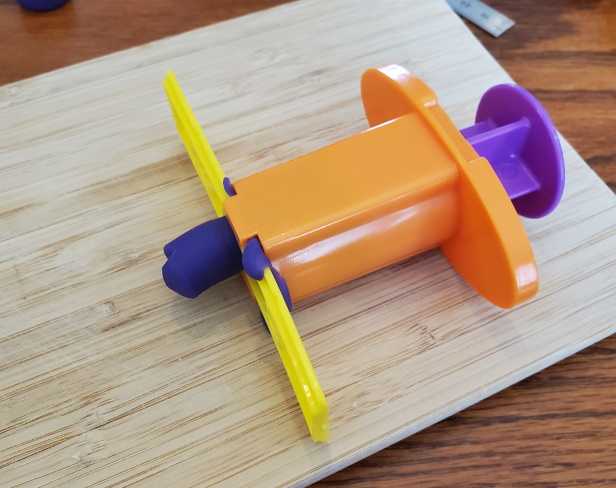
They started by making a short Play-Doh cylinder, basically “roll, extrude, trim.” It’s not fancy, but it’s the right shape for a quick demo because you can make a few versions that are close enough in size to compare without arguing about the specimen.
That kind of consistency matters even in a playful test. If the samples are roughly similar in size and shape, the resulting force-displacement data become easier to interpret.
Running the Play-Doh compression test
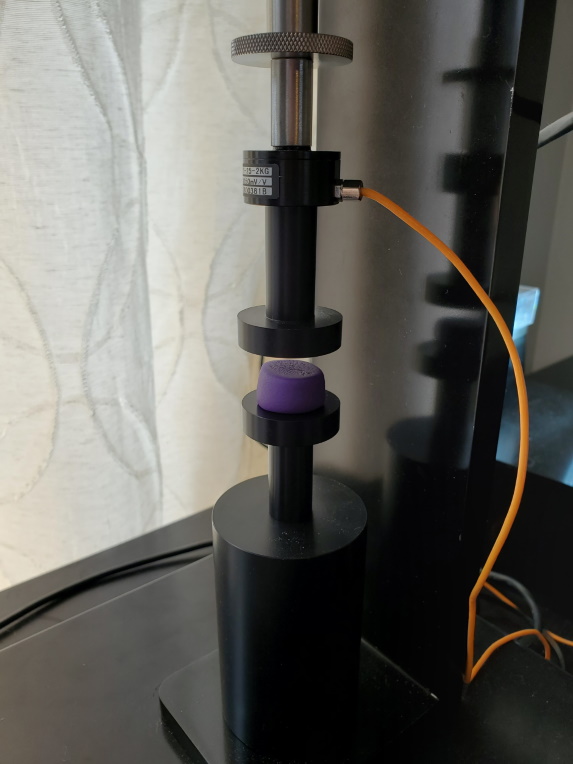
Once the sample was prepared, it was placed on the UniVert in compression mode. The sample was then compressed under controlled conditions so the system could measure how it responded as load increased.
That is the core idea behind a material compression test. A sample is compressed while force and displacement are recorded, giving a direct view of how the material behaves under load.

What the UniVert measured
For this demo, the UniVert used a 20 N load cell to measure force during compression. The controller recorded both force and displacement, which could then be exported for graphing and comparison.
Even with a familiar material like Play-Doh, this gives a useful introduction to how mechanical data are collected. Instead of describing the sample as simply “soft” or “firm,” the test creates a measurable record of how it changes shape under load.
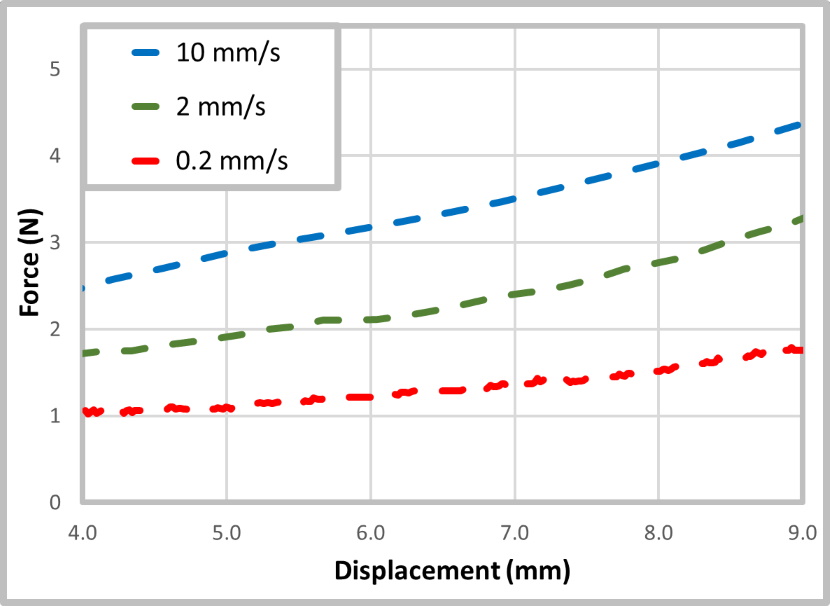
Looking at the results
After testing, the data were plotted to compare how the samples behaved under different compression conditions. This is where a playful demo starts to look more like a real engineering exercise. Once force and displacement are graphed, it becomes easier to compare sample response and talk about mechanical behaviour in a more concrete way.
That is one reason simple demos like this are useful. They take something familiar and turn it into an introduction to testing concepts that are also used in research and product development.
Why this kind of demo is useful
-
explore our page on Compression Testing
-
learn more about the UniVert
Final takeaway
You do not always need a highly specialized specimen to explain mechanical testing. Sometimes a simple material and a simple question are enough. In this case, Play-Doh was a fun way to demonstrate how compression testing works and how the UniVert records real mechanical data.